Navcutting Building Plans
This guide explains how I navcut my building plans, which is faster and easier than navmeshing them in my opinion. This guide also assumes you know the basics of creating a building plan using the CK.
The tutorial on the SS2 Wiki walks you through navmeshing a building model, but I find this process tedious and frustrating. Here's the thing: The base plot object is already navmeshed. (You can see this for yourself in the CK by finding the Activators starting with "SS2_Plot_" in the Object Window, and then right clicking one and selecting Navmesh Object.) So rather than telling the game where the NPCs can walk, I'd rather tell them where not to walk, and this is where navcuts come in.

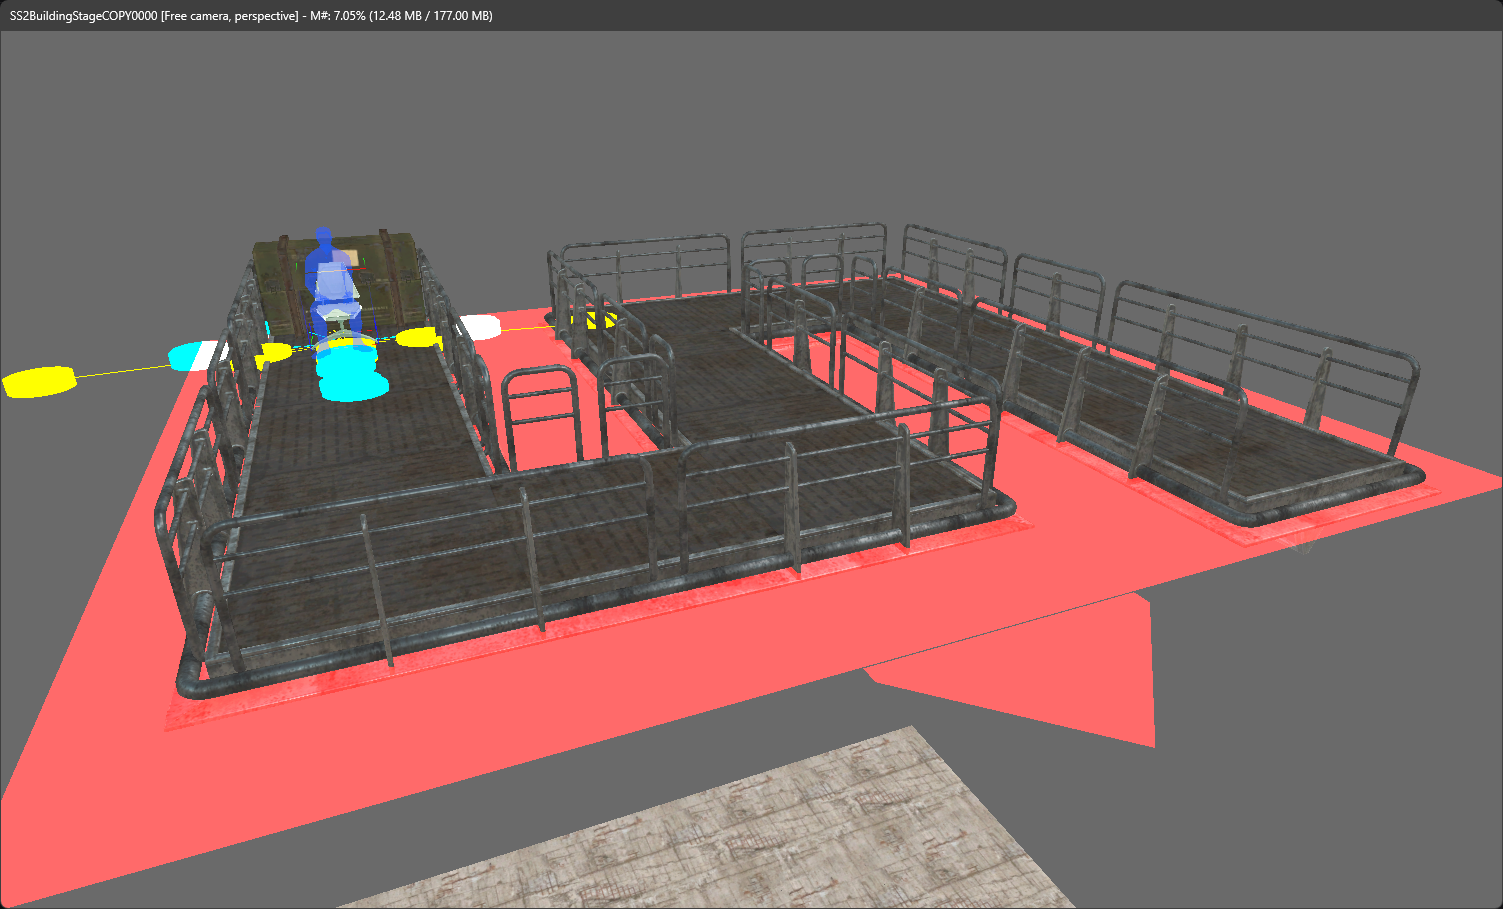
Pictured above is the 2x2 Agricultural Plot activator with navmeshing (the red part) already applied.
Multi-story buildings
There is one caveat to this however: This only works for building plans that stay low to the ground/plot activator. You will need to navmesh for stairs and any floors/stories higher than the first floor.
You can still place floor tiles above the plot navmeshing up to about 150 units high (according to my testing) and NPCs will still walk on them. Any higher than that and they will act like it is unreachable.
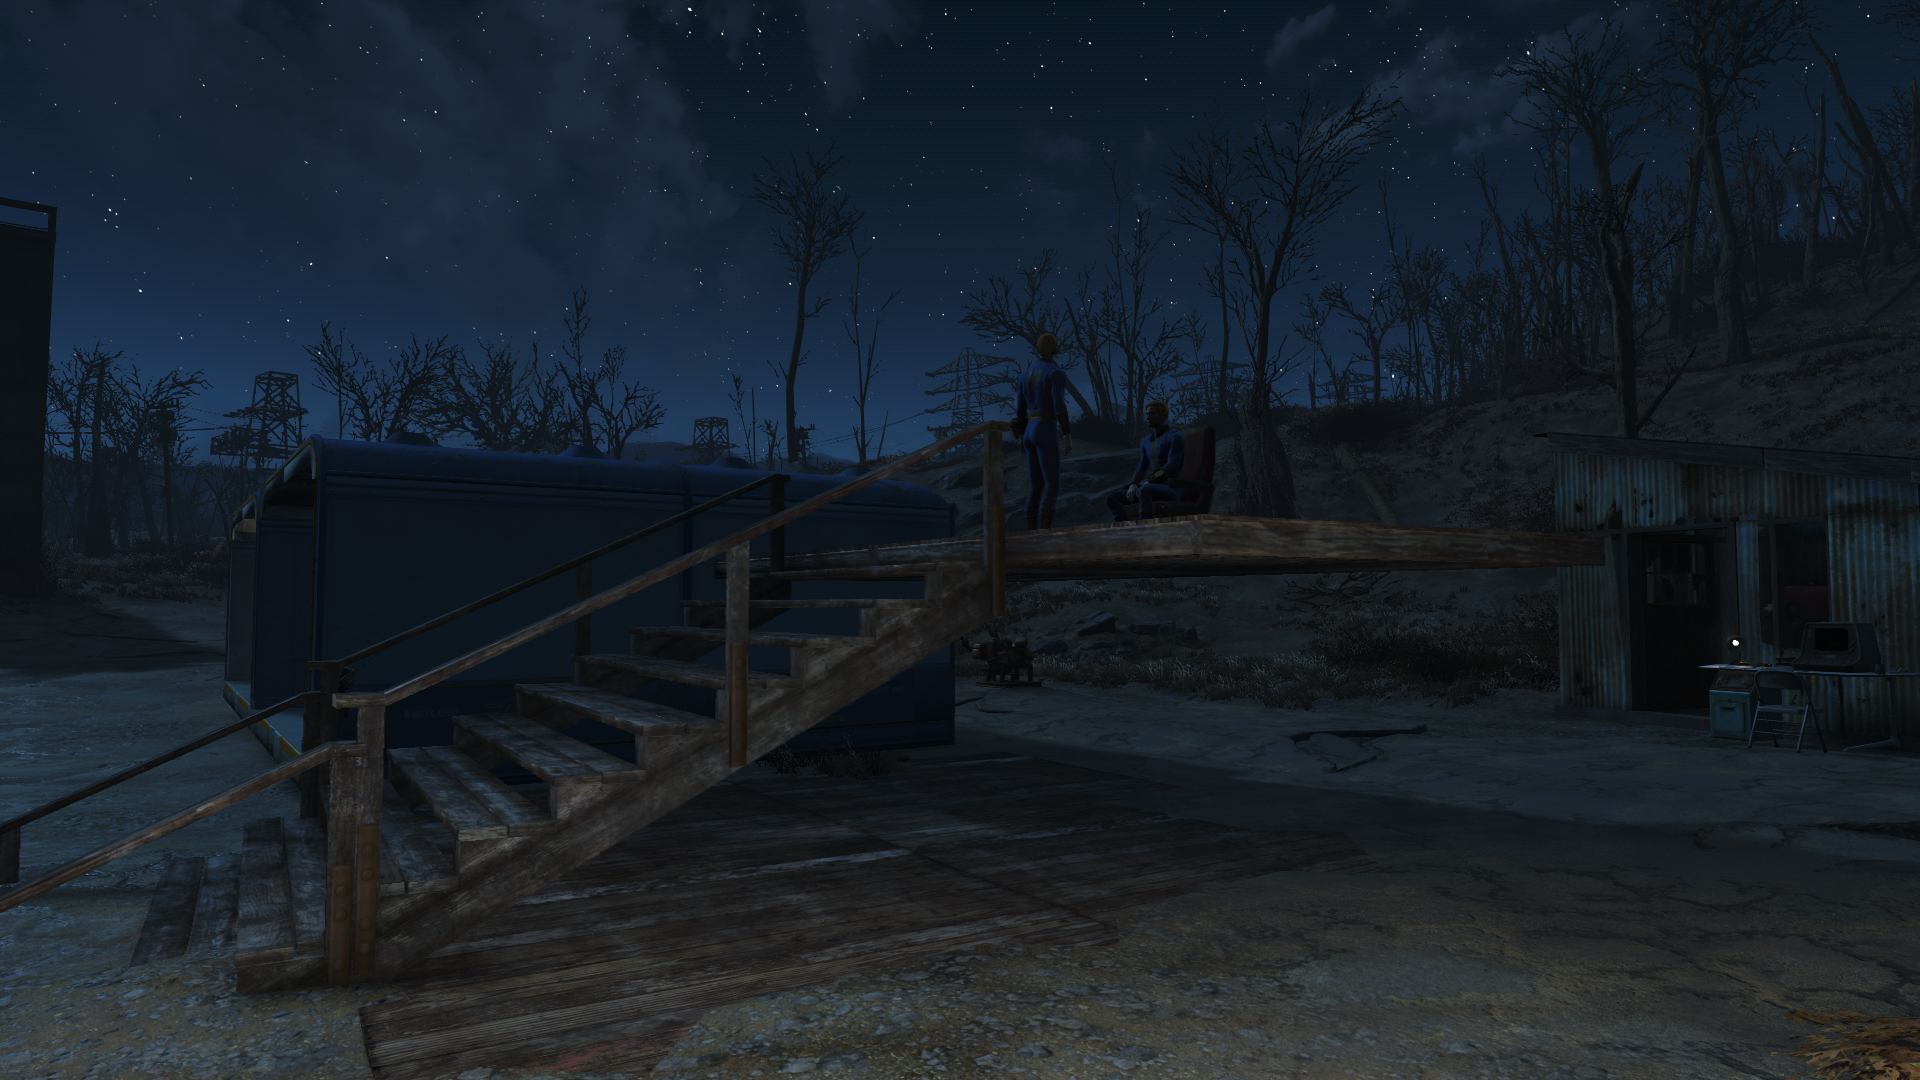
In the picture above, I tested navigation on this structure at different heights. It has no navmesh or navcuts on it, but NPCs were still able to walk on it to reach the chair on top of it until it got to be about 150 units higher than the plot's navmesh.
Adding navcuts to a building plan
This section assumes you've used the CK enough to design your building plan in a building stage cell.
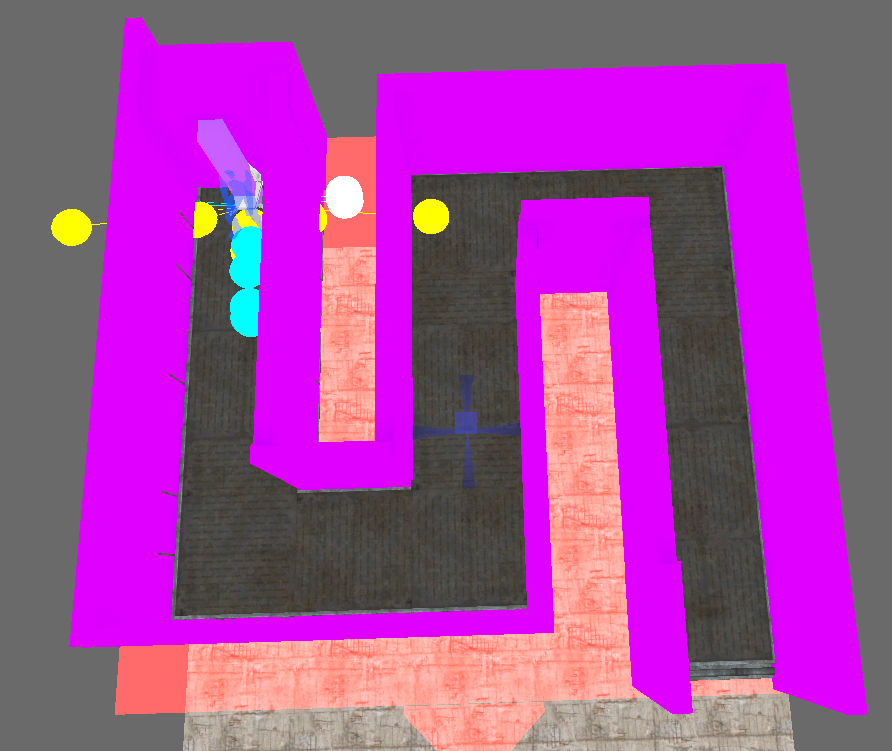
For this guide, I have created a simple "maze" for an NPC to navigate through to reach the chair at the end.
In this case, the chair is specifically for testing as the NPC we spawn to test navigation later needs furniture to navigate too. You can alternatively place a furniture piece in workshop mode if you don't want to include one in your plot.
Now let's place the navcuts. Search the Object Window for "kgSIM_Obstacle". These are the objects that we are going to place in the render where to represent obstacles. So I will place them on the railings, the box at the end, and the chair.
Why the chair too? In a normal plot, you might want NPCs to able to navigate around it if its in the way of where they are trying to go. So I usually put a skinny navcut on them to help with that. NPCs will still be able to use the chair as long as the entry ways to it (the yellow and blue circles) aren't blocked. In the example plot I'm creating, the front entry to it will remain unblocked, but the sides and back will be blocked.
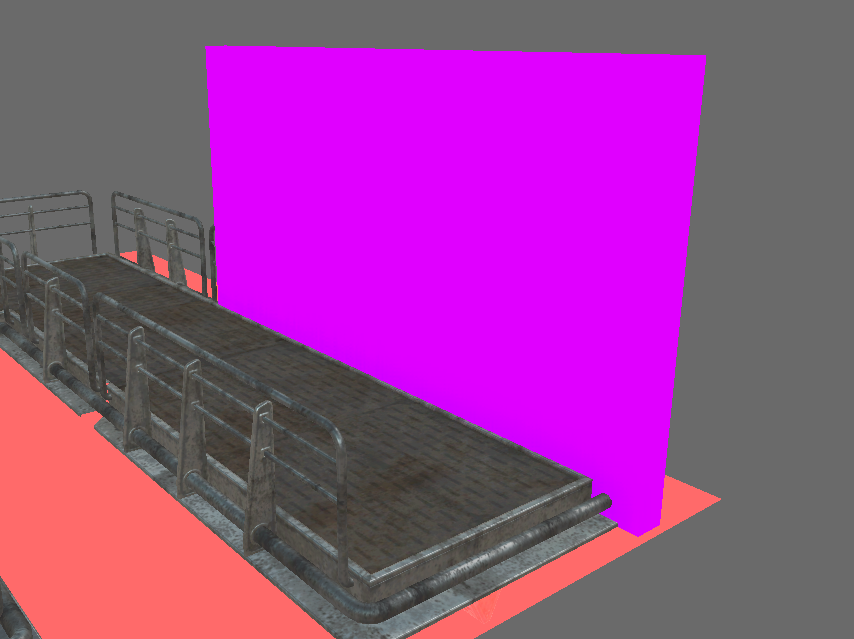
You typically want the base of the navcut object to be at 0 on the Z axis (assuming your plot alignment helper is also at 0), as the navmeshing on the plots is placed slightly higher than 0.
You can change the scale of the navcut objects, as you would any other object, if you can't find a existing navcut that fits your objects. Just be careful that you don't make navcuts so large that they might cut in to the navmeshing of another plot. For example, this can be a concern if you are making interior plans that might go into a vault or other pre-existing multi story building.
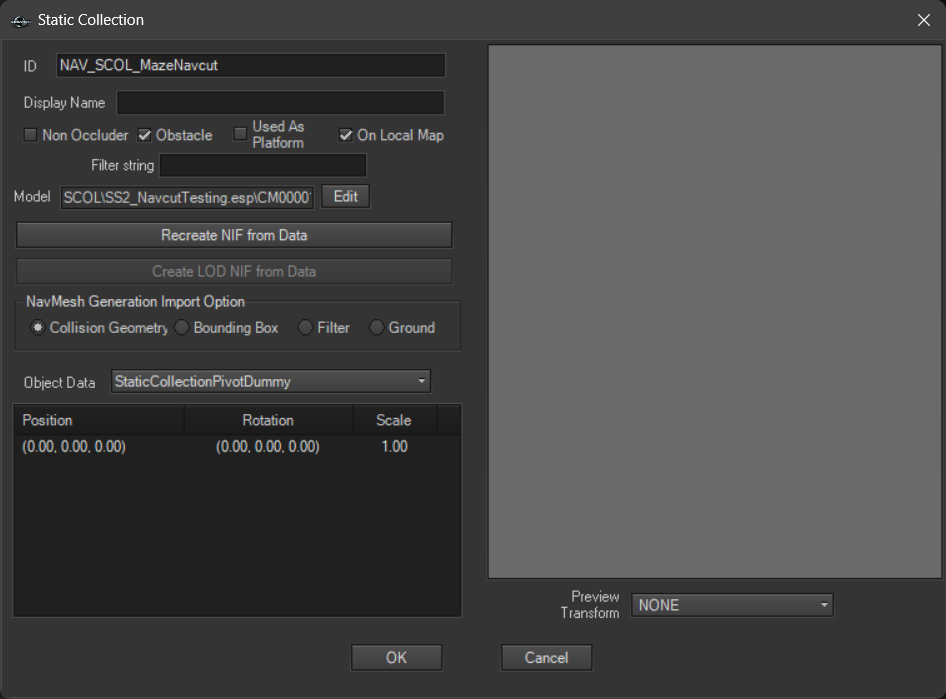
Now I've placed all of my navcuts. You can use them as plot spawns (like you would would for furniture, doors, lights, etc), but I recommend combining them in to a SCOL, similar to a building model, as spawning separate individual objects makes a building plan take longer to build. However, unlike a building model, you can skip exporting them as a NIF and just use the new SCOL as a stage spawn object.
Be aware that when you combine them in to a SCOL, they will appear to disappear from the Render Window. Don't panic! That's normal behavior. You can still select the new SCOL from the Cell View window's Objects list.
One very import thing to do next is to mark your new SCOL as an Obstacle. Find it in the Object Window, double click it, checkmark Obstacle, and click OK. (The SCOL will be invisible in this window too, but you can confirm that it contains the navcuts in the Object Data dropdown.)
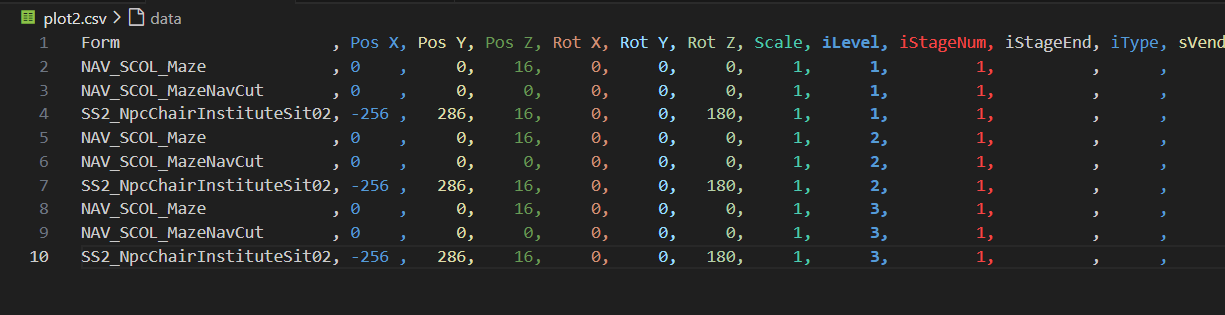
Now continue to create your building plan as you normally would and get ready to test it in the game. Make sure your CSV file, that will be imported using xEdit, contains your navcut SCOL.
Testing navigation
When you're ready to test the building plan in game, build it as you normally would.
If you have a piece of visible (selectable in the console) furniture, select it and type pft. This is an alias for placefurnituretester, which spawns an NPC that will attempt to navigate to and use the furniture you selected.
If your plot doesn't have a piece of furniture that you can select with the console, you can instead place a piece of furniture in workshop mode, such as a chair.
Here's a video of pft in action on the maze plot I built.
If your furniture tester doesn't move or doesn't make it to the furniture, then there is an issue with your navcuts somewhere. Go back to the CK, fragment your navcut SCOL and check the position of the navcut objects. Make sure they are sitting at 0 on the Z axis. Also make sure your SCOL includes a StaticPivotDummy at 0, 0, 0.
No Comments