Building Super Mario 64 on Retroid Pocket 3/3+

This guide expands on chronoreverse's guide with my own discoveries and additional information. This guide covers building the game using VDavid003's Android port with optional features such as a 60 FPS patch, Render96 (high-poly) models, and other enhancements not present in the original game. These instructions should also work on the Retroid Pocket 3+ as well as other Android devices. Performance will vary on different devices with different features enabled.
- Updated Nov 9, 2022: OTA update 1.0.0.50.
- Updated Dec 7, 2022: Added DynOS and Render96 info and additional performance info. Added more screenshots. Added short section on the GUI builder.
- Updated Jan 11, 2023: Checked newest OTA update 1.0.0.75 on RP3 and everything appears to work just fine. Also added a note in the Building the game section about extra steps RP3+ users may need to perform.
- Updated Jan 29, 2023: Added an additional pkg requirement for RP3+ users. Thanks to NoodlesAteMyBaby for figuring it out. Moved SSH guide to its own page so that I can reference it in other guides. Cleaned up mirror instructions a bit since they may no longer apply.
Requirements
- An Android device, such as the RP3, with internet access.
- Termux from F-Droid on that device. The Google Play Store version is out of date.
- A clean SM64 rom in .z64 format for either the US, JP, or EU region.
I can not provide a link to this rom for legal reasons.
Tool64 can be used to convert the rom from other formats.
Preparing Termux
Updating selected mirror (optional)
If you receive repo errors when running pkg commands, you may need to update your preferred mirror using the termux-change-repo command to make sure the Bintray mirror is not selected. You can also select mirrors in your region. The Bintray mirror appears to have been removed from the available mirrors in late 2022, but users that have had Termux installed since 2022 or earlier may still have it enabled.
Setup SSH (optional)
Entering commands with the Android touch screen can be a pain. You can either connect a keyboard or setup SSH to remotely connect from a computer instead. This also allows you transfer files to your device using a SFTP client.
The guide to set this up can be found here: Setting up SSH on Termux
Installing build requirements
Your Internal storage is mounted to /sdcard/ and your SD card is mounted to a folder in /storage/ with an ID that's different for different cards. You can check the ID using ls /storage/. It will be in a format such as 0123-4567. So if you place your rom in your Internal storage's Download folder, it will be in /sdcard/Download/ according to Termux. You will need to remember this location when it's time to build the game. In the below examples I use /sdcard/Download/.
- In Termux or SSH, run
pkg updateandpkg upgradeif you haven't already. - Install the X11 repo (required to get mesa package):
pkg install x11-repo - Install the rest:
pkg install mesa mesa-dev binutils git wget make python getconf zip apksigner clang - Place your SM64 rom in a folder in either your Internal device storage or SD card, such as Download.
- Give Termux access to your Internal storage and SD card:
termux-setup-storage
Building the game
At the time of writing this, the latest version of the RP3's OTA updates is 1.0.0.75.
To check your version:
- Open Android system settings
- Go to System > Advanced > Updater
- Find your version number on the OTA screen.
1.0.0.37 and up users can run the ex/nightly build of the game. This version comes with an optional 60 FPS patch and an optional DynOS patch.
1.0.0.8 and below users cannot run the ex/nightly build, but can run the ex/master build to get the rest of the features.
- Clone the branch to build:
- 1.0.0.37 an up users:
git clone https://github.com/VDavid003/sm64-port-android --branch ex/nightly - 1.0.0.8 and below users:
git clone https://github.com/VDavid003/sm64-port-android --branch ex/master
- 1.0.0.37 an up users:
- Change to the new folder:
cd sm64-port-android - Copy your rom to the current folder. It must be named baserom.us.z64, baserom.eu.z64 or baserom.jp.z64:
cp /sdcard/Download/sm64.z64 ./baserom.us.z64 - Download SDL requirements:
./getSDL.sh - Build the Audio File Library:
make -j $(nproc) -C tools/audiofile
Performance warning
Before getting in to the optional features and enhancements, I want you to be aware that the game may have performance issues when combining multiple features. The features that impact performance are the Render96 model pack, no draw distance, and HD texture packs. Combining any of these with the 60 FPS patch can result in the game running slower, not just a lower framerate.
Combining these features can also make the game use more RAM, resulting in Android frequently closing apps in the background, including your home/launcher app, to free up RAM.
For example, here are some of the tests I ran on my RP3. The FPS usually maintains about 60 FPS in the castle areas, but will dip and slow down in the levels depending on what's being rendered on screen.
- 60 FPS alone: 60 FPS stable.
- 60 FPS + No Draw Distance: 60 FPS stable.
- 60 FPS + No Draw Distance + SM64 Reloaded: Frequent framerate dips as low as 30 FPS with slowdown.
- 60 FPS + Render96: Frequent framerate dips as low as 30 FPS with slowdown.
- 60 FPS + Render96 + No Draw Distance: Frequent framerate dips as low as 20 FPS with slowdown.
- 60 FPS + Render96 + SM64 Reloaded: Frequent framerate dips as low as 20 FPS with slowdown.
- Render96 + SM64 Reloaded: Stable 30 FPS with occasional dips to about 25 FPS when a lot is on screen.
- Render96 + SM64 Reloaded + No Draw Distance: Frequent framerate dips as low as 15 FPS.
More powerful devices, such as the RP3+, may get better performance.
Optional patches
These are for the ex/nightly branch only. You must apply these patches before running the build command if you want to use them.
You can revert a patch using tools/revert_patch.sh (patch file).
60 FPS Patch
This patch interpolates new frames to try to match 60 FPS. It does not change the speed of the game logic. It will not skip interpolated frames when the devices struggles to keep up, so it will slow down the game when the framerate dips below 60 FPS.
To apply this patch run: tools/apply_patch.sh enhancements/60fps_ex.patch
DynOS Patch
Required if you want to use Render96 models. This adds DynOS to the game, a mod that adds a framework to make it easier to load other mods, such as model packs. It also includes some options to warp to levels. The DynOS menu can be accessed in the game's pause menu by pressing Z (L1 or R1 on a RP3).
To apply this patch run: tools/apply_patch.sh enhancements/DynOS.1.0.patch

Build options
Almost time to build, but this is where we have some options we can pick from. These options will be included in the build command in the format of NAME=VALUE, such as VERSION=us. There will be an example of this in the build command section below.
- VERSION (us, eu, jp)
Rom region. If you're building from and EU or JP rom, you need to set this to eu or jp. It is already set to us by default. - DEBUG (0, 1)
Enables the debug build. This is already disabled by default in the ex/nightly build, but not ex/master. So 1.0.0.8 users should set this to 0 to disable it. - TOUCH_CONTROLS (0, 1)
These are on screen touch controls, meant for phones and tablets. This is enabled (1) by default. Set to 0 for devices that have hardware controls such as the RP3. When disabled, touching the screen acts as the B button for some reason. - EXT_OPTIONS_MENU (0, 1)
An expanded options menu on the pause menu. This is enabled (1) by default in both branches. I recommend leaving it on as it gives you more game options such as camera, control, display, and sound options. Use 0 to disable it.
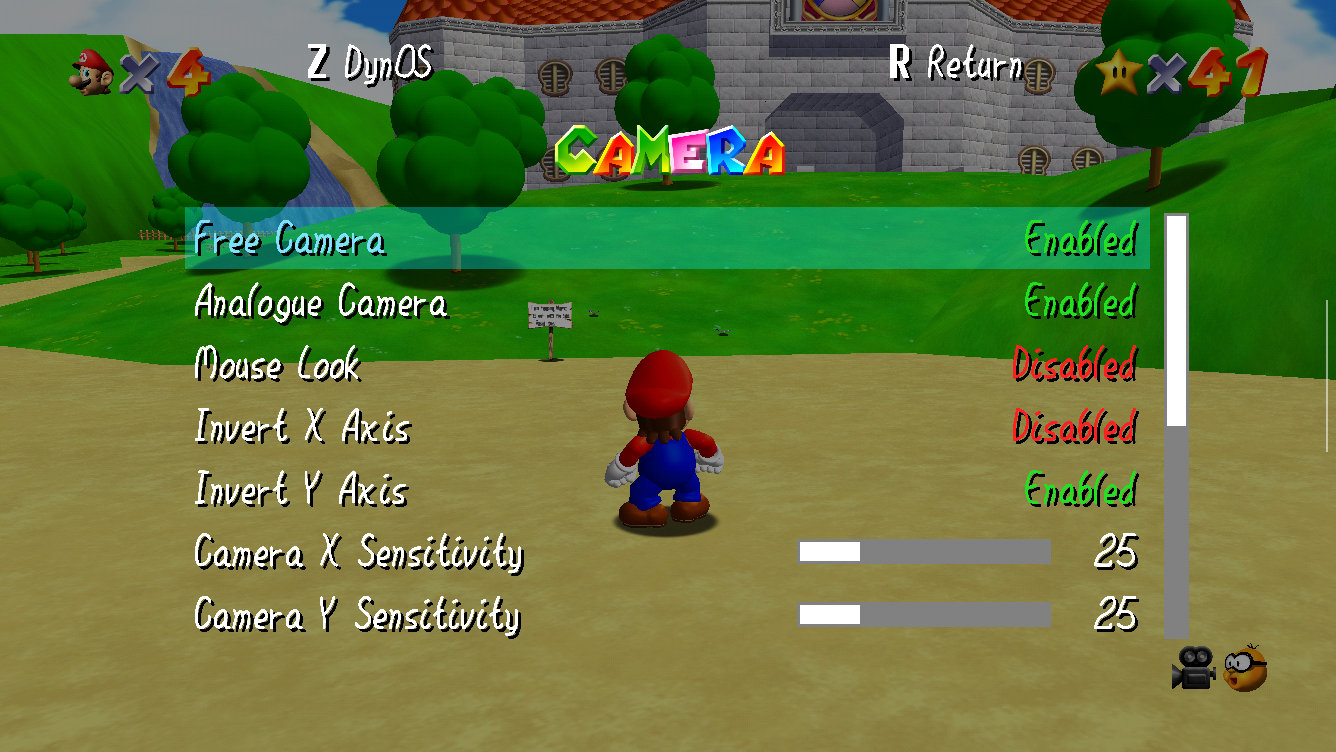
- BETTERCAMERA (0, 1)
Disabled by default (0), but I recommend enabling it (1). This implements PuppyCam in to the game to give you smoother camera control using the R analog stick, similar to modern 3rd person games. However, there are some quirks such as the camera often clipping through walls and turning unexpectedly after using doors. This is going to be entirely up to you if you want to use it or not. - TEXTURE_FIX (0, 1)
Disabled (0) by default. Enabling it (1) fixes some known texture glitches in the game, such as the smoke texture. - NODRAWINGDISTANCE (0, 1)
This is disabled (0) by default, and like the better camera option, it is up to you if you want to use it. With it enabled (1), all NPCs and objects on the current map are always loaded and active. For example in this screen shot you can see the chain chomp always lunging toward Mario even at long distance. This may have unintended side effects on the gameplay, but I haven't run in to any so far.
- EXTERNAL_DATA (0, 1)
Disabled (0) by default. Enable (1) if you want to load texture packs. See the Adding texture packs section below for more information. If you do not copy the base.zip file mentioned in that section you will get the error "Fatal error, could not load sound data from 'sound/sequences.bin.le.64'" when trying to load the game.


The build command
Use the make command to build with your preferred options. For example: make -j $(nproc) DEBUG=0 TOUCH_CONTROLS=0 BETTERCAMERA=1 NODRAWINGDISTANCE=1 TEXTURE_FIX=1 EXT_OPTIONS_MENU=1 EXTERNAL_DATA=1
Building can take several minutes. Make sure Termux remains running during this time.
If the build finishes without any errors, an APK file will be available in build/us_pc. Copy it to your Internal storage or SD card.cp build/us_pc/sm64.us.f3dex2e.apk /sdcard/Download/
Open your Files app, navigate to the folder where you copied the APK file, and open it to install it. If you enabled EXTERNAL_DATA, do not run the game just yet and read the next section.
Alternatively, if Termux is running, you should be able to access the sm64-port-android/build/us_pc folder directly in the Files app and install the APK file from there.
Adding texture packs
If the game is built with EXTERNAL_DATA enabled, a base.zip file can be found in build/us_pc/res/. This must be copied or extracted to /sdcard/Android/data/com.vdavid003.sm64port/files/res/ and then texture packs can be extracted to this same folder. If you do not copy the base.zip file you will get the error "Fatal error, could not load sound data from 'sound/sequences.bin.le.64'" when trying to load the game.
cp build/us_pc/res/base.zip /sdcard/Android/data/com.vdavid003.sm64port/files/res/
Here's an example using GhostlyDark's SM64 Reloaded texture pack.
wget https://evilgames.eu/texture-packs/files/sm64-reloaded-v2.4.0-pc-1080p.zip
unzip sm64-reloaded-v2.3.0-pc-1080p.zip -d /sdcard/Android/data/com.vdavid003.sm64port/files/res/
The game may take longer to load with texture packs installed. With SM64 Reloaded's 1080p pack, the game takes me about 20 seconds to start.
Adding Render96 models
This requires the DynOS patch from the Optional patches section above.
To unzip a 7z file in Termux, you need the p7zip package: pkg install p7zip
- Change to the dynos/packs folder. You may need to create the folder if it doesn't exist.
mkdir -p /sdcard/Android/data/com.vdavid003.sm64port/files/dynos/packs/cd /sdcard/Android/data/com.vdavid003.sm64port/files/dynos/packs/ - Download the latest release from https://github.com/Render96/ModelPack/releases
wget https://github.com/Render96/ModelPack/releases/download/3.2/Render96_DynOs_v3.2.7z - Unzip the file
7z x Render96_DynOs_v3.2.7z - (Optional) Remove the 7z file
rm Render96_DynOs_v3.2.7z - Run the game and load/start a save
- Pause the game and press Z (L1 or R1 on RP3) to open the DynOS menu
- Select Model Packs
- Enable Render96 DynOS v3.2
Cleaning up
If you want to rebuild with new options, you will need to run make clean in the sm64-port-android folder first.
To remove the entire cloned repo, return to the Termux home folder using cd ~ and run rm -Rf sm64-port-android.
Other notes
Cheats menu
The game has a cheats menu included, but I believe you must build with the expanded options menu enabled (EXT_OPTIONS_MENU=1) to use it. To enable the cheats menu on RP3, pause the game and press L3 three times. You will hear a sound effect confirming that it has been enabled. You can then find the CHEATS menu in the R options menu under EXIT GAME.
The moon jump cheat says to press L to use it, but it is actually L3 by default on the RP3.

The differences between the ex/master and ex/nightly branches
There's actually multiple differences, but mainly ex/nightly includes graphics code updates from the original sm64-port repo. The RP3 on 1.0.0.8 can't handle these updates for some reason, resulting in a black screen when loading the game if built from ex/nightly. The 60 FPS patch included with ex/nightly is also designed for these changes and does not work with ex/master.
GUI Builder
VDavid003 has also made a GUI Builder that is supposed to be able to build the game for you, however I was unable to get it to work as it seemed to be missing some files or unable to download files that it requires. If you want to check it out for yourself, his video guide is here and the download link is in the description.
Questions? Need help?
The comments system for this wiki software is a bit funky and I'm still trying to work it out. So if you'd like to ask me for help directly, join either the Retroid Pocket Office discord or the Retro Handhelds discord and ping me (@Samutz) in an appropriate channel. Or message me on Reddit at u/MrSamutz.